Dependency injection with Dagger
Written on January 13 2015.
This blog post was written a long time ago and may not reflect my current opinion or might be technically out of date. Read with a grain of salt.
Dependency injection (or DI) is quite a big topic in object oriented design. It can be quite hard to grasp for junior developers but it is a pattern that should be in your toolbox.
This small blog post will briefly show you how to use Dagger, a common DI framework in the Android world.
Android Example
Jake Wharton's u2020 is an Android app showcasing the use of dependency injection using Dagger.
The app is full of great tips but taken together, they can be a bit overwhelming if you just want to learn the framework. The injection depends on the variant of the app: the debug version have a completely different layout that includes a debug drawer. It is a great learning app but you probably don't want to deal with all that complexity when you just want to learn how Dagger works.
Our app: Inject an Webview url at runtime
To illustrate the DI, we will change the url displayed by a webview at runtime. Change url by endpoint and webview by API and you'll have a very common scheme in Mobile apps. This can be useful if you want to switch between your testing and staging servers to test that everything is working.
In this post, we'll see how we can dynamically change the endpoint our app is talking to. Beware that it could become dangerous in a real application: dynamically changing the endpoint at runtime is not a good idea if you have a session on the server or if you use a local database to synchronise data with the backend. You can easily meangle all your data and send inconsistent requests to the server.
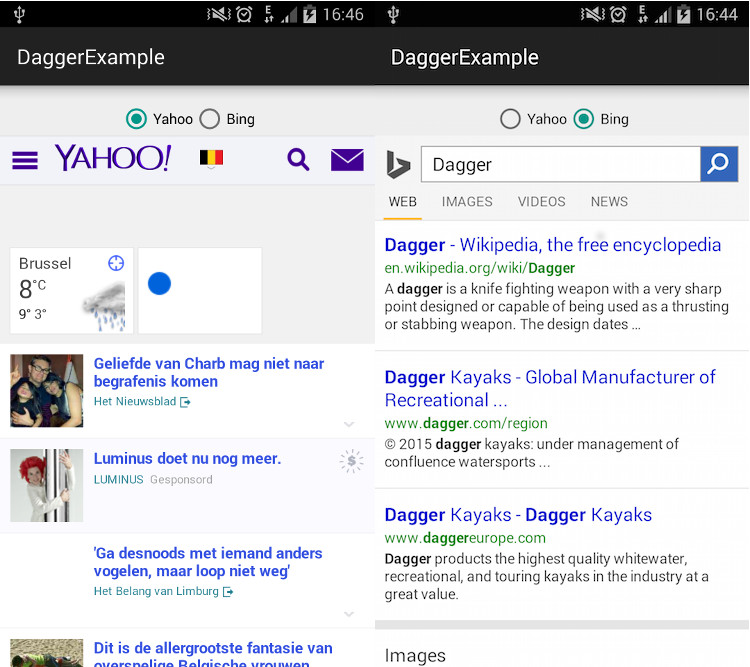
Our app will be very simple: a webview and radio buttons. The webview will display Yahoo or Bing according to the currently selected radio button.
Annotations
This app shows three very simple annotations of Dagger: @Inject, @Provides and @Module.
@Inject (on a field)
This annotation shows that you want to inject a value in this field. We will see later when values are injected.
@Provides (on a method)
@Provides shows that the annotated method can provide a value. Provider methods are part of a Module.
@Module (on a class)
A module is the entry point of the injection. We will build our object graph with a Set of modules. We then inject objects that have injectable fields into this object graph to get them populated.
Code
The app has two modules, BingEndPointModule and YahooEndPointModule. Those are injected at runtime when you choose Bing and Yahoo in the UI.
@Module(injects = { MainActivity.class })
public class BingEndpointModule {
    @Provides
    Endpoint provideEndpoint() {
      return new Endpoint("http://bing.com/");
    }
}
In the @Module annotation, you can notice that you have to provide where this module will be injected. Dagger verify at compile time that you haven't messed up.
In the main activity, we wrote a simple method to switch:
private void updateModule(Object module) {
    objectGraph = ObjectGraph.create(module);
    objectGraph.inject(this);
    refreshWebview();
}
Which is called when we change the selection of the RadioGroup:
private void selectBing() {
    updateModule(new BingEndpointModule());
}
As you see, there is nothing really fancy in this code. I wouldn't use Dagger for such a simple case in practice but keeping it small helps to identify the key parts of Dagger.
You can get the whole source code on the Github repository.
Closing
That was short. Once again, you should clone u2020 and study its source code. It shows quite a lot in a condensed app.