Gradle Build Variants for your android project
Written on October 5 2013.
This blog post was written a long time ago and may not reflect my current opinion or might be technically out of date. Read with a grain of salt.
When developing an app, you usually have many slightly different versions of this app. The most common example is probably the backend you want to use: production or staging.
You usually define the base URLs with the other constants of the app. Switching from one environment to the other is done by (un)commenting the right lines:
public static String BASE_URL = "http://staging.tamere.be"
//public static String BASE_URL = "http://production.tamere.be"
The process is manual, boring and error prone but hey, changing one line is not that bad, is it?
Then you add more and more features that depends on the environment. You maybe want a different icon and then different input validation rules and then ...
That's where your build tool can help. Let's see how we can automate the process of generating different APKs for different environment with Gradle.
Build variants
Gradle has the concepts of Build Types and Build Flavors. When combining the two, you get a Build Variant.
There two default build types: release and debug. We won't change them in our example but we will create two new flavors: production and staging.
As a result, we'll have four different variants:
- ProductionDebug
- ProductionRelease
- StagingDebug
- StagingRelease
Sample project
The project is pretty simple but shows how you can define for each build variant:
- an app name
- an icon
- constants (in our case a
BASE_URLvariable)
You can download the project on Github.
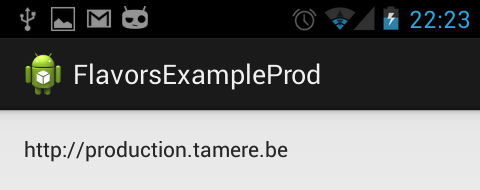
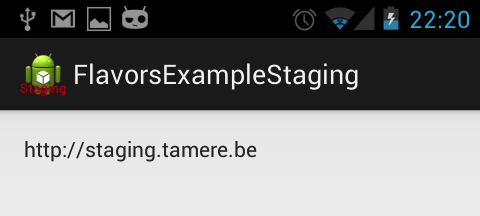
Here are two screenshots of the generated apps. Nothing really fancy:
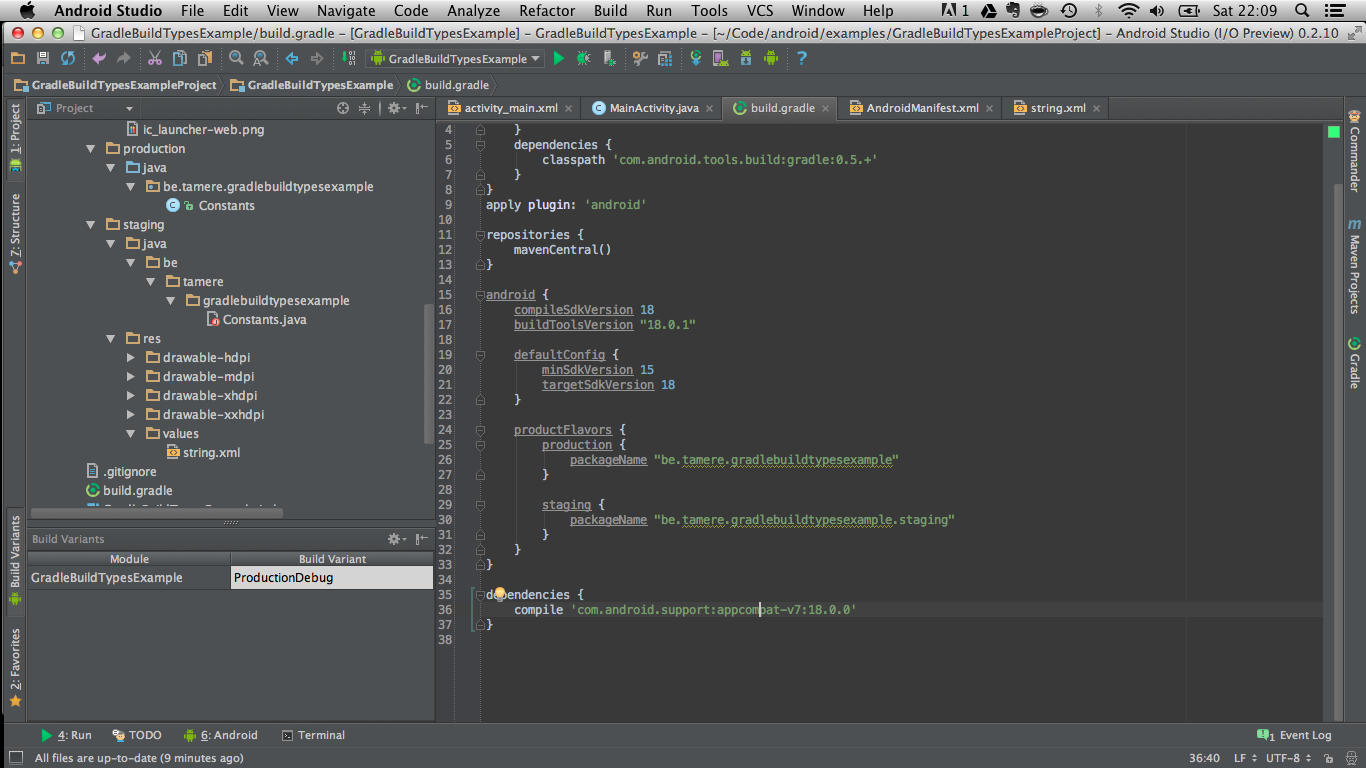
build.gradle file
buildscript {
    repositories {
        mavenCentral()
    }
    dependencies {
        classpath 'com.android.tools.build:gradle:0.5.+'
    }
}
apply plugin: 'android'

repositories {
    mavenCentral()
}

android {
    compileSdkVersion 18
    buildToolsVersion "18.0.1"

    defaultConfig {
        minSdkVersion 15
        targetSdkVersion 18
    }

    productFlavors {
        production {
            packageName "be.tamere.gradlebuildtypesexample"
        }

        staging {
            packageName "be.tamere.gradlebuildtypesexample.staging"
        }
    }
}

dependencies {
	compile 'com.android.support:appcompat-v7:18.0.0'
}
The definition of the flavors is super simple, all the magic will happen in their folders.
File structure
In the src folder, we've created two directories whose names must match the flavors. We will define all the flavor-specific values. Only specific values are necessary.
The staging version defines new icons while both flavors defines a Constants.java. The app name is defined in the string.xml files.
├── main
│   ├── AndroidManifest.xml
│   ├── ic_launcher-web.png
│   ├── java
│   │   └── be
│   │       └── tamere
│   │           └── gradlebuildtypesexample
│   │               └── MainActivity.java
│   └── res
│       ├── drawable-hdpi
│       │   └── ic_launcher.png
│       ├── drawable-mdpi
│       │   └── ic_launcher.png
│       ├── drawable-xhdpi
│       │   └── ic_launcher.png
│       ├── drawable-xxhdpi
│       │   └── ic_launcher.png
│       ├── layout
│       │   └── activity_main.xml
│       ├── menu
│       │   └── main.xml
│       ├── values
│       │   ├── dimens.xml
│       │   ├── strings.xml
│       │   └── styles.xml
│       ├── values-v11
│       │   └── styles.xml
│       └── values-v14
│           └── styles.xml
├── production
│   └── java
│       └── be
│           └── tamere
│               └── gradlebuildtypesexample
│                   └── Constants.java
└── staging
    ├── java
    │   └── be
    │       └── tamere
    │           └── gradlebuildtypesexample
    │               └── Constants.java
    └── res
        ├── drawable-hdpi
        │   └── ic_launcher.png
        ├── drawable-mdpi
        │   └── ic_launcher.png
        ├── drawable-xhdpi
        │   └── ic_launcher.png
        ├── drawable-xxhdpi
        │   └── ic_launcher.png
        └── values
            └── string.xml
Android Studio
You can switch between the two flavors in the Build variants tab of the IDE. Android Studio has some trouble identifying the resources for a non-active flavors.
We are using the production flavor, Studio does not understand that the staging folder contains source code. Don't worry, it's normal, it will catch up when you switch to the staging variant.
Launch the app with the different flavors to see the result.
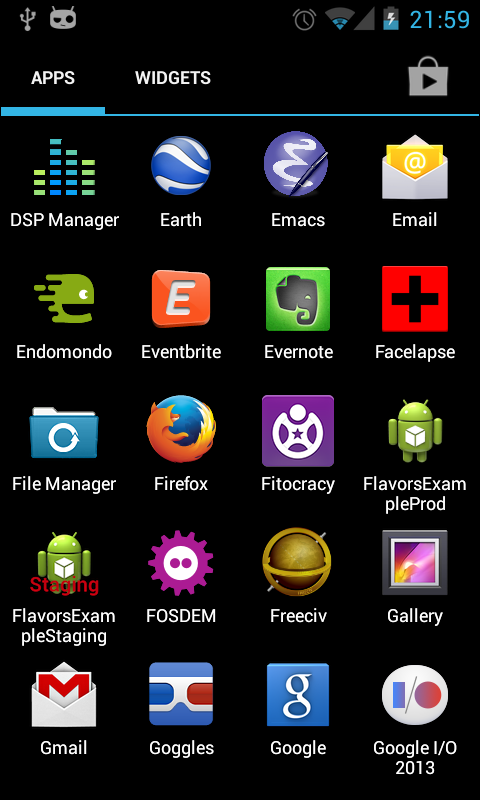
The app drawer shows the two icons:
References
- http://tools.android.com/tech-docs/new-build-system/user-guide#TOC-Product-flavors
- Xav's answer on this Stack overflow topic is particularly helpful.